Mapping Tips and Useful Links
Quote from ChickenMobile on June 18, 2011, 4:06 amGroxkiller585 wrote:5. Also, be sure to place your prefab close to the map origin so that when you use it, it is not far away from where you clicked.If you hid everything in your map except your prefab then created the prefab at the origin to begin with, you wouldn't have this problem.
Nice tip with the &i grox.
If you hid everything in your map except your prefab then created the prefab at the origin to begin with, you wouldn't have this problem.
Nice tip with the &i grox.
Quote from msleeper on June 19, 2011, 7:45 pmOr you can just use instances.
Or you can just use instances. ![]()
Please do not Private Message me for assistance. Post a thread if you have questions or concerns.
If you need to contact the staff privately, contact the Global Moderators via Discord.
Quote from ChickenMobile on June 20, 2011, 9:26 ammsleeper wrote:Or you can just use instances.Unless you are making a prefab.
Unless you are making a prefab.

Quote from kwp21 pitts on June 20, 2011, 11:37 pmchickenmobile wrote:msleeper wrote:Or you can just use instances.Unless you are making a prefab.
I would prefer to use instances over prefabs any day. Alot less horsing around. Unfortunatly, I can't use instances with certain games.
EDIT: Anyone may PM me If they need help. I always search the vdc on a regular basis, and will find somthing useful. In some cases I might make examples for some to work with. All you need to do is ask.
Unless you are making a prefab.

I would prefer to use instances over prefabs any day. Alot less horsing around. Unfortunatly, I can't use instances with certain games. ![]()
EDIT: Anyone may PM me If they need help. I always search the vdc on a regular basis, and will find somthing useful. In some cases I might make examples for some to work with. All you need to do is ask.

 VDC User Page
Quote from Skotty on July 25, 2011, 4:31 amOverview of available flashlight textures for env_projectedtexture:
flashlight_border
flashlight_moon (just white)flashlight_security001
flashlight001
flashlight001_improved
flashlight001_intro
flashlight002
flashlight003
flashlight004
flashlight006
flashlight007Don't use any texture with existing .vmt. In nearly every case you will get tiling textures, even outside the FOV of the env_projectedtexture.
Overview of available flashlight textures for env_projectedtexture:
flashlight_border
flashlight_moon (just white)
flashlight_security001
flashlight001
flashlight001_improved
flashlight001_intro
flashlight002
flashlight003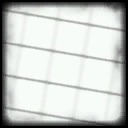
flashlight004
flashlight006
flashlight007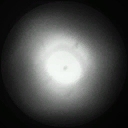
Don't use any texture with existing .vmt. In nearly every case you will get tiling textures, even outside the FOV of the env_projectedtexture.
Quote from neco on July 31, 2011, 6:22 amAccidently ran across this, might look like a simple thing but since I haven't found it elsewhere might be interesting for users of non-English keyboards who don't know, yet. Hammer shortcuts unfortunately can't be customised.
Changing the grid size is also possible by using ALT+s (increase) and ALT+a (decrease) thus you can keep your right hand holding the mouse. Usually you had to use 'ALT GR+8' or 'ALT GR+9' which isn't that convenient. It helped me a lot and sped up my working in Hammer...
Accidently ran across this, might look like a simple thing but since I haven't found it elsewhere might be interesting for users of non-English keyboards who don't know, yet. Hammer shortcuts unfortunately can't be customised.
Changing the grid size is also possible by using ALT+s (increase) and ALT+a (decrease) thus you can keep your right hand holding the mouse. Usually you had to use 'ALT GR+8' or 'ALT GR+9' which isn't that convenient. It helped me a lot and sped up my working in Hammer...
Quote from neco on November 5, 2011, 12:22 pmRescaling frames without distortion:
Came across this method while rescaling several frames for a map and thought it might be useful for others, too.
Usually the frame will be distorted and the 45 degree angles won't be maintained when using the resize transformation handles. You can prevent this by resizing the frame using the vertex tool.
Also creating the frame manipulating the vertices of rectangular brushes is easier than using the clipping tool.
After having resized the frame you can solo the object by pressing CTRL+H, then using the face editor (SHIFT+A) to select and mark the pertinent texture and simply hit 'fit' to realign all faces at once.rescaling_frames.jpgAnother useful thing I found out was to create your own 'rectangular' soundscape areas using trigger_multiples replacing the env_soundscape entities.
Create your own fade-in/fade-out logic_relays and let them trigger your desired sound files when 'start_touching' or 'end_touching' the area defined by the trigger_multiple.
The trigger_multiple method also has also the advantage to be exactly a large as the room if desired.fade_in_out.jpg
Rescaling frames without distortion:
Came across this method while rescaling several frames for a map and thought it might be useful for others, too.
Usually the frame will be distorted and the 45 degree angles won't be maintained when using the resize transformation handles. You can prevent this by resizing the frame using the vertex tool.
Also creating the frame manipulating the vertices of rectangular brushes is easier than using the clipping tool.
After having resized the frame you can solo the object by pressing CTRL+H, then using the face editor (SHIFT+A) to select and mark the pertinent texture and simply hit 'fit' to realign all faces at once.
Another useful thing I found out was to create your own 'rectangular' soundscape areas using trigger_multiples replacing the env_soundscape entities.
Create your own fade-in/fade-out logic_relays and let them trigger your desired sound files when 'start_touching' or 'end_touching' the area defined by the trigger_multiple.
The trigger_multiple method also has also the advantage to be exactly a large as the room if desired.
Quote from baca25 on November 11, 2011, 7:08 pm!!!For New Coop Map Makers!!!
When it come to testing coop maps, there are a few basic things you have to know! It took me months to figure this all out, when I first started making coop maps. So I hope you stumble across this before you reach that point.
*When you create a coop map, it must be named mp_coop_mapname. If you don't have the mp_coop_ in the name, then it won't work.
*When you want to test your map by yourself you need to use the split screen. After you have compiled your map, go to the main menu of Portal 2, then type in "ss_map mp_coop_mapname" into the console(press the ( ` )key at the top left of the keyboard, to open the console). This will start the map in split screen mode.
*Once your in split screen mode you start only controlling the blue robot. SO to control the orange robot, type in the console "sv_cheats 1" which enables cheats. Then you type in "in_forceuser 1" That will allow you to control the orange robot. If you want to control the blue robot again, then type in "in_forceuser 0"
*Hope this helps.
!!!For New Coop Map Makers!!!
When it come to testing coop maps, there are a few basic things you have to know! It took me months to figure this all out, when I first started making coop maps. So I hope you stumble across this before you reach that point.
*When you create a coop map, it must be named mp_coop_mapname. If you don't have the mp_coop_ in the name, then it won't work.
*When you want to test your map by yourself you need to use the split screen. After you have compiled your map, go to the main menu of Portal 2, then type in "ss_map mp_coop_mapname" into the console(press the ( ` )key at the top left of the keyboard, to open the console). This will start the map in split screen mode.
*Once your in split screen mode you start only controlling the blue robot. SO to control the orange robot, type in the console "sv_cheats 1" which enables cheats. Then you type in "in_forceuser 1" That will allow you to control the orange robot. If you want to control the blue robot again, then type in "in_forceuser 0"
*Hope this helps.
Mapping Since May 21, 2011
Quote from Pitkakorvaa on November 18, 2011, 12:41 pmFor Portal 2 !!
When using custom sound/music in your level, possibly it won't play when activated and you may get this error:
"[Sound] S_StartSound(): Failed to load sound 'destination music/mymusic.wav'. File is missing from disk/repository."Well now you fix this problem, I give you two options.
First(recommended):
Go to your "steamappscommonportal 2portal2cfg" and create file called autoexec.cfg then
write this snd_updateaudiocache in the file. Now every time you run Portal 2, it updates audio caches. And that fixes the 'mute' ambient_generic entitys. And why this way? Because when you have custom sounds in your level, you can include this file, when releasing the map, and everyone who plays the level can hear custom sounds.
Second:
Just write snd_updateaudiocache to console and restart map.Hope this helps everyone who is willing to use custom sounds!
For Portal 2 !!
When using custom sound/music in your level, possibly it won't play when activated and you may get this error:
"[Sound] S_StartSound(): Failed to load sound 'destination music/mymusic.wav'. File is missing from disk/repository."
Well now you fix this problem, I give you two options.
First(recommended):
Go to your "steamappscommonportal 2portal2cfg" and create file called autoexec.cfg then
write this snd_updateaudiocache in the file. Now every time you run Portal 2, it updates audio caches. And that fixes the 'mute' ambient_generic entitys. And why this way? Because when you have custom sounds in your level, you can include this file, when releasing the map, and everyone who plays the level can hear custom sounds. 
Second:
Just write snd_updateaudiocache to console and restart map.
Hope this helps everyone who is willing to use custom sounds!
