File Size: 4.02 MB
Downloads: 9,662
Rating: 4.71 (52 votes)
Description
Not much here, this is my first map made for Portal 2, using the Alien Swarm SDK. And any all feedback is greatly appreciated! Thanks. v1.1 updates: -Fixed a small overlay issue. -Correct a spelling error -Changed map name to cassatachamber_1.bsp to avoid confusion.

Comments
Sign in to comment.
http://i36.photobucket.com/albums/e42/G ... Map1SS.pnghttp://i36.photobucket.com/albums/e42/G ... Map2SS.pngHere are two larger screenshots of the map after just walking in.

This is kind of nitpicky of me, but- 'Congratulations' was written as 'Congradulations' at the end. xD
That aside, though, this was a really great map- really fun to solve. (Though, is the light bridge actually used for anything, or is it just... there?
The light bridge is actually a part of the legitimate solution to getting to the exit once you remove the cube from the button in the corner, to place it on the button that opens the door. Play testers each found their own solutions to get to the door each and every time, each of which was creative and very difficult to resolve but yeah, the light bridge was the intended way.
As far as the spelling error, haha... wow, that's embarrassing. I'll fix that once I get off of work this evening. 
Were there three boxes? There are 3 places to put boxes but only two that I found, there seems to be a dispenser which I never used. Instead I reused the box from the escape door to complete the glassed cased switch by the light bridge. Then portalled back to the main room and went through the door with only one tick. It looked a bit odd.
Really good map though, kept me thinking this afternoon, thanks!
Here's a demo of the way I solved it, if you're curious. http://dl.dropbox.com/u/18787920/portal ... han_04.dem
This was a fun map, well done.
I would suggest making the jump to get to the button by the exit (the first time) less finicky because I messed up a few times in trying to record that demo by accidentally putting the blue gel on the wall under the exit, which caused me to bounce off the wall instead of off the floor to get to the button.
I was able to complete it without the use of the diagonal panels (activated by the button higher up)...was that a decoy? Also, were the clean gel butto/nozzle and the near-by inactive nozzle also decoys? Effective! Great job!
One more thing, I'd recommend renaming your submissions other than testchamber. It's bound to get confusing quickly!
@jester8886
Actually, the puzzle is intended be solved with the diagonal puzzles, but I'm sure now that you mentioned it, it is possible to solve the map by creating a line of conversion gel and using the funnel to get you high enough to bounce up onto both ledges. That's interesting because if that's how you did it, that will be the first time I've seen someone do it that way. Good job.
As for the cleaning tube. That's for if someone gets their box covered in conversion gel, it will make the cube much harder to work with and unnecessarily frustrating, so I added that there so they can clean their cube off.
The item dropper in the room parallel to it is actually a box dropper. It's only purpose is to respawn a cube if you either fizzle it or drop it in the hazard water. Hope this answers your questions. 
Update:
I updated the map with the suggestions I got earlier. If you already downloaded the map, theres nothing new that effects game play so this update wont mean much to you.
Oh, heh. I actually don't really get that explanation, which is good, because I'm going to go try to find a solution with the light bridge now. I love puzzles that can be solved in multiple ways. xD *mostly stopped paying attention after "another legitimate solution"
Whiiich probably means I'm going to spend the next couple of hours trying to solve this in various ways, heh.
Quick note: I was looking for another way to solve it and managed to get myself trapped. There is a panel that sticks out when the final button is pressed. It's possible to place a portal on that panel and one inside the mini-chamber, use the repulsion gel to hop up, then hop from the panel again for the extra height, which allows you to get to the door- And, consequently, the button by it. Grabbing that box and using the repulsion gel to bounce up into the higher portal again and placing the box on the square button will result in the panel moving out, which disrupts the portal on the panel, leaving you trapped in the smaller chamber (since the exit closes).
Tell me if you need a better description. Of course, this problem is very easily avoided by simply placing the portal somewhere else, but I thought you should know.
...That quick note wasn't really much of a quick note. Oh well. xD
I actually found out about that trap but forgot about it before I released it. Doesn't seem like a huge deal at the moment though, I'm moving on to my next puzzle chamber, I might get back to this one and find a solution.
Thanks! one of the best maps I ever played in portal2. I hope that you can make more maps.
Well that's how I solved the map:
used the blue wave to get the blue gel below exit, then I used the blue wave thing on the floor till I got enough air then I opened a portal in the horizontal panels and got enough air to reach the button near the exit. The last room I indeed used the bridge opened a portal in the panel that comes out when you activate the button and then I painted the stairs with blue gel where the level starts because if you jump in them you start to get really high then I was able to get to the bridge and normal jump to the exit.
Excellent map. It was fun and just challenging enough to take a bit of time, but not so long that it frustrated me. I believe I used mostly intended solutions on my first run through.
I played it a second time to look for alternate routes:
In that one run I beat it without ever deactivating the dual vertical light bridges, without activating the angled surface, and without using the light bridge from the hidden room. Before deactivating it I used the light tunnel to paint most of the floor under the exit ledge. Then to reach the exit without the tunnel I put a portal on the vertical surface that moved out with that third button pressed and was able to just jump a few times to the ledge.
Hey there.
Thanks for sharing that map with us.
It is a really nice map. Good puzzles, was fun to play that map.
bugs
- You should try to avoid the jumping-gel on some spots
- It is easy to transport the gel everywhere in the room
- It is possible to solve that puzzle without most of the buttons
video of complete map solving
yAQ4DPIGz0c
Nice map, good job!
Now, please create some long co-op maps!
Regards
PortalCombat
CassataGames wrote:
Not much here
Disagree. I spent a good five minutes poking around before I understood what was going on and the mechanic to solve it. Very nice work. Looking forward to seeing more.
An autosave would be nice before the death water just because it's the first time you're in danger of dying and having to do half the chamber all over again.
There isn't a conversion gel tube, to my knowledge. There is a repulsion gel tube, which -should- be spewing repulsion gel, and there is water, which is to clean your box if you get it covered in gel. That one will only activate when you press the button.
It pours water when you (IIRC) press a button. It's so if your cubes get covered in repulsion gel, you can clean them off so they'll sit on the buttons. If your buttons never get gelled, you don't need it; I didn't.
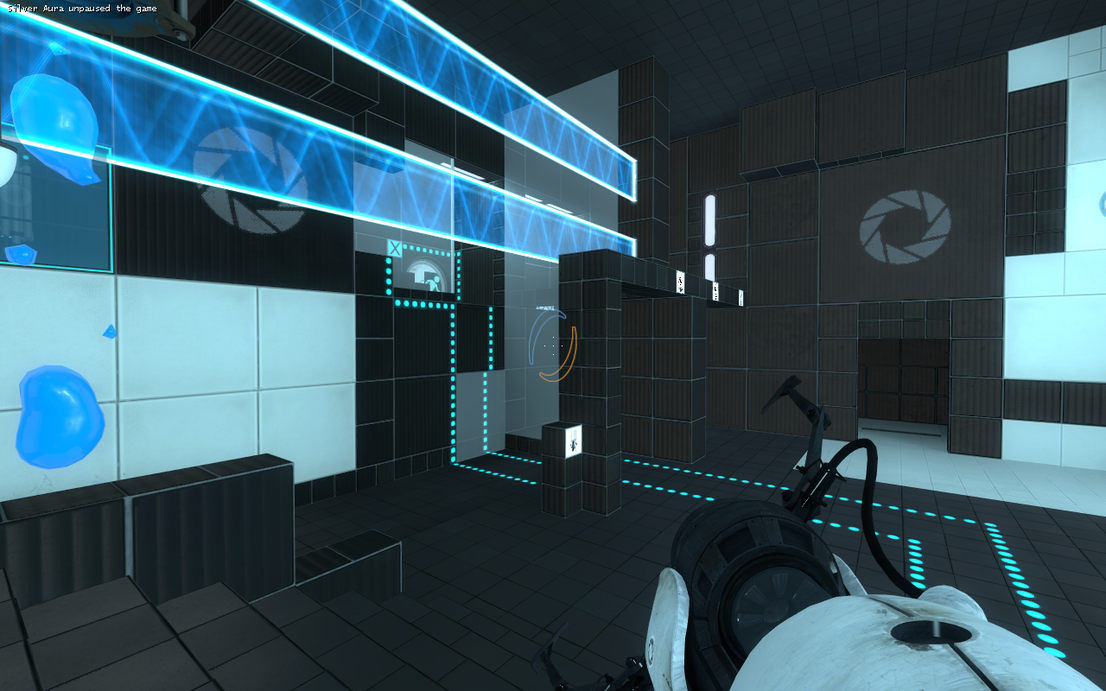
I'm referring to the tube I have circled in this screenshot:
http://www.betaarchive.com/imageupload/ ... .20563.jpg
Unless i'm missing something it doesn't seem to do anything?
Shane wrote:
I'm referring to the tube I have circled in this screenshot:http://www.betaarchive.com/imageupload/ ... .20563.jpg
Unless i'm missing something it doesn't seem to do anything?
Your image link won't work for me("hot linking banned"), but I'll assume you're asking about the cube dropper which only activates if you destroy a cube.
Awesome map, great puzzle. Everything worked fine. Your portal 2 maps are just as good as your 1's. Thanks for creating. 5/5
A++ would play again. The light bridge at the end kind of stumped me a little but overall great map.
Great map, but I felt as if I solved everything the wrong way. (which did).
I got the two cubes by using the glitch where you can increase your height indefinately by just jumping on the repulsion gel. After i had done this, I figured out the proper solution and used that afterI died and had to start again.
I also solved the last bit after the panel comes out by jumping onto the repulsion gel on the floor direclty below the panel, then bouncing over.
It is one of the best p2 maps so far, and these issues aren't really a problem since they are still solving the puzzle.
There is a glitch where
If you jump on the blue gel, then let yourself continue bouncing, you will somehow gain momentum and end up much higer than your original height. Happens twice in this video:wDzm4v5r6uY
Oh! I noticed that myself, though I never considered it a glitch. You only gain the additional height under the condition that you jump from the gel itself, on the second bounce, right? It's not an indefinite increase in height, though, just about half a Chell. I think. xD
Yeah i used the same method as hanging_rope.
also you can use crouch jump to get on the ledge without Excursion Funnel.
all in all a perfect 5. also i've pocked into your file a bit hope you don't mind. i wanted to know how you rotated panels for about 35?. so that helped me a lot.
anyway thanks for sharing..looking forward for next one
An elegant map for a more civilized age. Incidentally, a "cassata" is a kind of cake so you can see this series has a brilliant future.
It took me several minutes, but it was fun. Since i couldn't use the cleaning gel to get some extra blue gel off the wall that i transported to the wall near the exit, having gel on that wall made jumping up to the exit door just a tiny bit harder. I was too lazy to start over so i just made my jumps a little more carefully. I did use the light bridge to stand near the exit and the blue gel on the floor in front of the exit to bounce up there... that's not what everybody did? heh.
This was a triumph. Fantastic map.. great puzzle, and very clean and professional looking. The goals and exit were clearly visible and light trails indicated what buttons controlled what. Yet it still didn't give away the obvious solution at first glance and makes you think for it. This is a great example map of what a good custom chamber should be. Looking forward to more from you. 5/5
I have completed it, it turned out it did the first part slightly wrong, resulting in a more difficult solution than the "original" solution. I have covered the right spots in blue gel, but I forgot to throw myself up the ledge in the middle, But jumped on the gel from the floor. It didn't gave me enough momentum to get up the ledge with the cubes, but enough momentum to grab the cubes from the ledge. Same thing when I needed to place the cube on the button near the exit. I failed to compute that you need to jump on the ledge in the middle before jumping on the blue gel, so I propel me and the cube, and needed to catch the cube mid-air, otherwise the cube bounced away because of the blue gel I had there.
Thought I'd share a video I made featuring this map. Try not to mind my wacky vernacular and utter failure to notice the boxes.
ntubUxt13GY
Krem wrote:
Thought I'd share a video I made featuring this map. Try not to mind my wacky vernacular and utter failure to notice the boxes.
gameplay looks SO much better on a vid when there's NO DIALOG.
j/s
:-X
I started playing custom maps and record me playing them. It's neither a perfect run nor do I have to have solved the map in the way it's meant to solve it. I play the maps "blind", that means I've never been in them before and play them for the very first time. I also give a little feedback for the map in the video description.
Maybe you are interested in the fact, that I played your map: http://www.youtube.com/watch?v=S-LpsKxpgMw
This had a great design, but I got stuck the first time through. Turns out that if you get the wrong box, you'll be trapped in the light bridge room with the "Mind the Gap" gap, and have to kill yourself in the gap slime. Overall, the getting the gel to different places was fun and it had some unique ideas with the signage.
Thanks. I was jumping too much in this map. I quess there is more "sofisticated" solution than mine.
Here's my alternate solution of this map. I know there's an easier way to do it, but I just like to find ways to solve the map that the author didn't think of.
http://www.youtube.com/watch?v=MvhmJZBaBhE
Very nice one, except that one can get stuck in the little room with the Mind the Gap symbol (I am not the first to point this out...). Might want to add a button in that room that re-opens the wall?
I used the alternative solution you described, I never used the light bridge, nor did I go through the diagonal portal when placing the second cube. Maybe it's just me, but I like my solutions "tighter", less open-ended, still nice and enjoyable. gj!

Not much here, this is my first map made for Portal 2, using the Alien Swarm SDK.
And any all feedback is greatly appreciated! Thanks.
v1.1 updates:
-Fixed a small overlay issue.
-Correct a spelling error
-Changed map name to cassatachamber_1.bsp to avoid confusion.
File Name: cassatachamber_1.bsp
File Size: 4.02 MiB
Click here to download Cassata Chamber 1