Map
Not Just A Box (v4)
Hello fellow Portaller! This is MrBob806, and you just found my first map! A few testing elements included are buttons (huge surprise, I know), boxes, aerial faith plates, fizzlers, a home-made dumbwaiter, unusual gravity, impossible structures, and even a death grid! (You should fling yourself into it. The sound is amazing.) At various times in playtesting, it has been reported to be that a puzzle is impossible to solve. This is not the case. All the puzzles are quite simple, but with a few tricks that aren't typically extremely obvious. Have fun, and any feedback is welcome! v2: Made red grid of lasers in the first room fizzle boxes, erasing the player's ability to trap themselves by flingng the box through the grid. Also added a bit of humor to the exit elevator. v3: put it back to v1 so a MAJOR bug created by v2 is fixed. I'm working on a true v3 (which will be labeled as v4) so that both issues are fixed. v4:problem solved. lasers now kill the box, while allowing for the solution to be executed. I also lit up the elevator screens and added a message to the end elevator.


Fling Thing - Level 26
My first mapping attempt - Fling thing is a small portal level revolving around the fling. Hopefully not too easy, playtime should be somewhere around 15 minutes. I'd really appreciate feedback on the design and what could be done to improve it. Ver 1.0.1 Includes: A Readme A slight modification to reduce failed flings Decals on the walls to make portal walls more obvious
Primal Decay
My first ever published map (Prime->Primal)A fairly short, fairly easy map in the destroyed aperture style (Decay)that contains two test chambers and a linking sectionin between them. V1.1- Fixed some major puzzle issues in the level (most notably the ones pointed out by John 11)
Secondary Fire: Flings
The first of a set of maps I call "Secondary Fire". The reason for it being called secondary fire is that the player can only use the Orange Portal. This test chamber includes the use of flinging, Hard Light Bridges a little bit of timing and Force Deflection Fields. Overall the map isn't very difficult but it will require the player to go back and forth a lot. Thanks to FourthReaper for the Force Deflection Field texture. UPDATE I believe I have fixed the problem with the Dual Portal Device. What I think happened is that the player would "miss" the trigger_weaponstrip placed at the base of the elevator so I moved that trigger and the Portal Device up a bit.
April 08 Contest Super-colliding Super-pack
The two maps submitted for the April 08 contest. See readme for installation instructions. See individual map downloads for screenshots, etc. 5 May: Updated to include fix for rmaze1 so that it loops properly when placed in the pack.
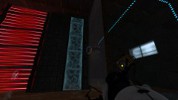
Bounded
A small map of medium difficulty. The solution is not difficult to execute. There is also a challenge version included, called sp_bounded_c, which is slightly harder. Some important points: 1. The yellow field fizzles objects, but NOT portals. 2. There is a small delay before death lasers actually get activated. So there's a time gap between your pressing the relevant button and the death field turning on. This is not a hint, but something that can be eventually noticed - I just want to save the player's time. 3. To prevent tight timing (and increasing the height of the room), I modified the death fields slightly so that even if you touch the lasers while ascending, there is be a small time interval before you're killed. So you can still get out safely even if you touch the lasers (FROM BELOW) briefly. You can test it to get a better idea. 4. The cube button in the 2nd room saves the game when activated (just a reminder to those who don't quick-save often). It doesn't do anything except that. View "ReadMe.txt" for installation instructions. Special thanks to HeadShot, Jacu, KennKong and RogerL for playtesting (the normal version only, not the challenge one), coming up with unintended (and intended) solutions, and providing feedback and tips. And to FourthReaper for the nice custom texture/functionality.
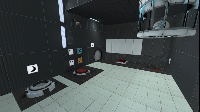
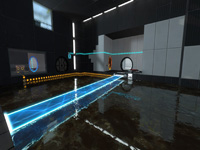
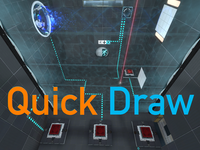
Quick Draw
Hey guys, its been a while since I released a map, so here it is! This map was made in a week, and it consists of two chambers. Special thanks to my friend (iStarStruck) for designing Chamber 1! Chamber 2 was designed by me, and both chambers were made by me. This map was purely made in Hammer. Note: This map is not part of the JFTC series, its just a stand-alone map. Note 2: If you don't really care about the test chamber sign, ignore the "scripts" folder. Difficulty: Medium Size: Medium Theme: Clean, Behind the Scenes Testing elements present: -Laser Field -Angled panel -90? panel -Excursion Funnel (polarity change) -Repulsion Gel -Propulsion Gel -Thermal Discouragement Beam (and its receptacle) -Discouragement Redirection Cube -Fizzlers -Basic elements (cubes, buttons, switches...etc) Remember to rate it and comment about what you think about it! Blindruns are much appreciated, they help me alot! Changelog: v1.0-v1.1 -Fixed unintended solutions --Made Chamber 2 larger --Reduced white surfaces on the room in Chamber 2 -Included an "angled wall version" of the map for players who are having problems with the angled panel (such as bmail) --The angled panel in the "angled wall version" is now replaced with an angled wall instead. Walkthrough: (v1.0) Warning! Spoiler alert! Only watch if you're stuck or have already completed the level! [spoiler]JWiUVLFuQ98[/spoiler] Screenshots: Screenshots [spoiler] Entrance to the first chamber, with the test chamber sign. An overview of the first chamber. Ditto. Ditto. Ditto. The Goo and angled panel in Chamber 1. The right room of Chamber 1. Behind the scenes section seen from Chamber 1. The hallway between chambers 1 and 2. An overview of Chamber 2. Ditto. Ditto. A room in Chamber 2 An overview of the room in Chamber 2. Ditto. Behind the Scenes section. Ditto. Ditto, with a view of Chamber 1 through the grate.[/spoiler] Added to the Steam Workshop: http://steamcommunity.com/sharedfiles/f ... =154863757 Thanks for testing!
contest0108-Marty-Nadez01
Portal map :P Great Portal map with Nice lighting and 3 Fun challenges for any player to do.
Pestchamber 22
You are a test participent in aperture science. I had fun making it, so i don't care if you don't like it. If you do like it then i do care :3
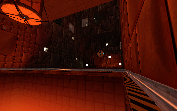
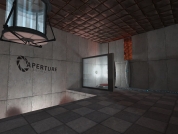
Positive Discouragement - Chamber 01
"Positive Discouragement" is a small map pack that I'm working on. I decided that I might as well upload this here, instead of having it sit around on my computer until I finish all the maps, but I'm not going to upload it to the Workshop until they're all done. So for now, you'll have to do it the old-fashioned way! (place the .bsp in your "portal 2/portal2/maps" folder) ====== This chamber is the intro chamber, so it -isn't supposed to be super hard -is meant to be the most destroyed of them all. I fashioned it after 'sp_a2_dual_lasers' On a side note, this map is a VisLeaf mess. Guess how many numportals? Almost 3500. I didn't know how to make 3D skyboxes at the time, but now I see that I really should've used that, as it would've saved me so much trouble and time. I may revamp it before the workshop release. Anyway, enjoy! Don't forget to leave feedback, it is much appreciated. ====== Changelog: 1.0 -Release 1.1 -Changed the BTS area -Reworked the map so that it doesn't use linked_portal_doors -Changed some trigger_look settings -Fixed a broken animation on one of the fizzlers ====== A big thanks goes out to Lpfreaky90. If it weren't for her and her troubleshooting ability, this map wouldn't even exist. I'm serious. Hammer was telling me there was a leak in the middle of the void so I couldn't compile. Also, thank you to Stimich, who helped me beta-test!
